Column fluting jig
 Fiqure 1
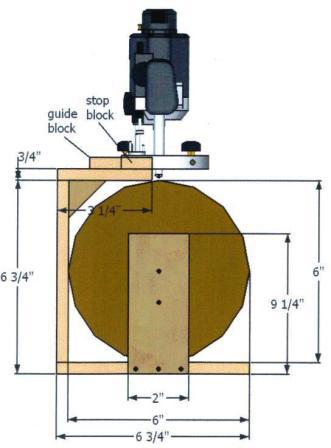
The picture is the completed column fluting jig.
The column should be cut 1/16" less than the inside of the jig. The pipe clamp tightens the column shaft within the jig and prohibits the column shaft from rotating. |
Fiqure 2
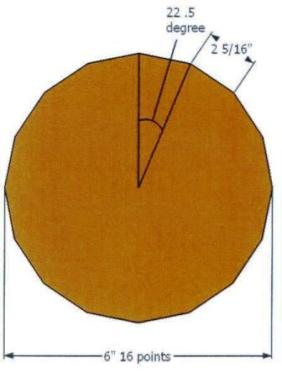
This is an end view of the column jig.
This jig is designed for a 6" shaft. The end plate is has 16 points. These points determine the qty. and are used to align the flutes on the shaft.
|
 Fiqure 3
|
fiqure 4
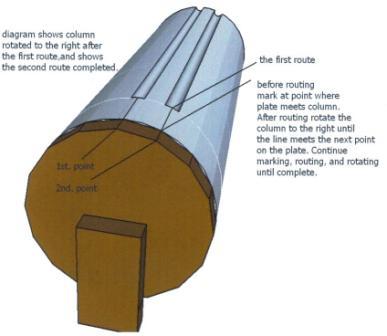
Before routing make marks on the shaft where the shaft meets the point of the end panels.
If you want to stop the routes at the top or bottom of the column be sure to set stop blocks at the beginning and end of the router path.
After routing loosen the clamp and rotate the shaft until the the first marks you made align with the the next points on the end plates. Then tighten the clamp, make new marks on the shaft and route. Continue this until complete.
|
From Column fluting jig to Woodworking Tips
If you'd like to build your own sight look at this!
|


