|
Glued up panels
The first thing to consider with glued up panels is the width of the boards. My rule is no greater than 3" wide. If you're using 1 x 6 as your stock this should work out perfect. If you're using 1 x 10 as your stock you will probably end up with 2"+. I know this seems awfully narrow but the boards will not usually be cupped at this width, and if they are, they will be able to be faced flat with a minimum of thickness lost.
Glued up panels Which brings me to the first step. Crosscut your boards about 3" longer than you need. This will allow for sniped ends at the planer. Then rip your boards to approximate width allowing for edge joining.
Glued up panels Step 2 The 'Cup' is from edge to edge, the 'Bow' is from end to end. It is always best to take the bow out. In order to do this you should realize you will reduce the thickness of the stock. If this is a consideration you will need to start with thicker stock. If the bow is minimal you may be able to take it out in one pass. This is not usually the case. It will probably take two passes. First try this- run an end in about 3" and pull it back. Spin the board around and then face the full length of the board. This will probably be satisfactory.
Glued up panels Step 3
Glued up panels Step 4
If your blades are knicked and are leaving a hump(s) move your fence to a clean area. With soft wood these humps are not usually a real problem (with enough bar pressure you can flatten them) but with hardwood they will not allow you to achieve a invisible glue line.
If you are not able to find a chip free area on your blades replace or resharpen them. Knicks are one problem but dull blades are another. Dull blades cause flaking and ripping of the edge grain and also gives the opposite effect to what you are trying to achieve- that is your board will come off the bed with a bow.
-After acheiving a near state of perpendicular perfection join both edges of your boards.
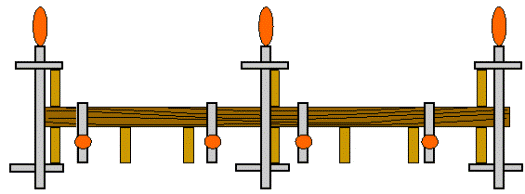
Glued up panels Step 5 If you are using pipe clamps consider making lift blocks to hold your boards. They are simply wood used to hold the panel boards to the correct height so the clamp pressure is directly on the center of the panel edges.
At this point you will see how your facing and joining worked. If the facing worked out well you will have no bows. This is not usually the case. There seems to always be a board or two that bows. With practice yoou will find out how much is too much. We will assume that there are some bows, but no more than 1/32" projection. If it is greater than this exchange the board. The edges should all butt to each other with no gap.If not rejoin. At this point you thing I'm crazy if you're going to go through all that again and you don't have wood to waste.... Ok-I've gone through this a hundred times- in woodworking this is just one of the craft's many obstacles. There is perfection, perfect, and really good and there is only 1/128th of difference between them.
If your're like me you're going for really good, I figure I have at least a 50/50 chance.... now
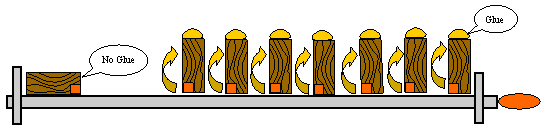
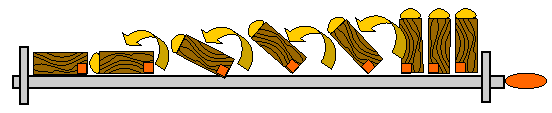
your boards are on the clamps- tighten the clamps to within 1/4" of tight.This will save jostling the boards when they are wet with glue.
Now- As you finish a board flip it down as the next drawing shows and push it into the board. Do this with all the boards.
If necessary you can adjust boards with a soft mallet or by hand
and gradually tighten the clamps until you have full pressure.
|
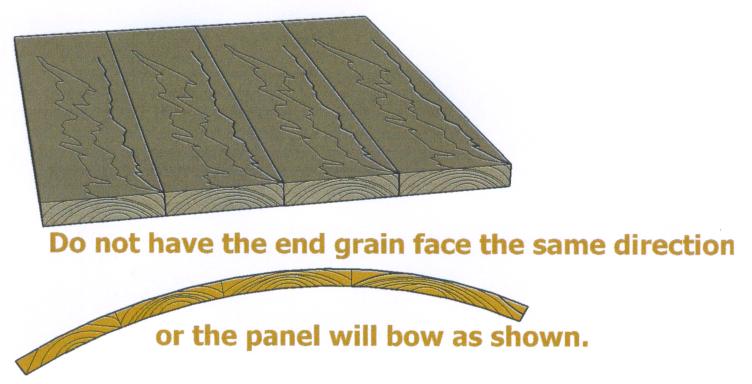
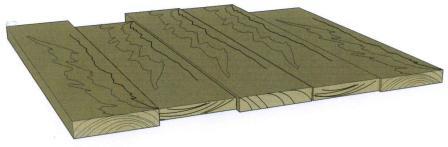 Make sure that the end grains are alternated.